Tuesday, April 16, 2013

Our Home Canvas

I mentioned we've moved recently, so I have lots of projects in mind and a clean slate to work with. That's both a good and bad thing-- I have far more ideas or inspiration I've found than time to complete what I want. Typical first world problem, I know.
I'm currently working on a family gallery wall in our upstairs hallway. I had a gallery wall of sorts in our old house, but I'm sprucing it up a little here at the new house. Today I'm sharing a fun project I've completed for the wall. Leading off our home subway art/frame, I made this:

Initially I was going to add only the 3200 (it would've been bigger), but decided it needed a little more than that. Want to make one too? Here's how:

Supplies

Artist canvas

Acrylic paint

Scrapbook paper

Vinyl or stencil

Foam brush

Mounting squares/glue dots

Baker's twine


Tutorial

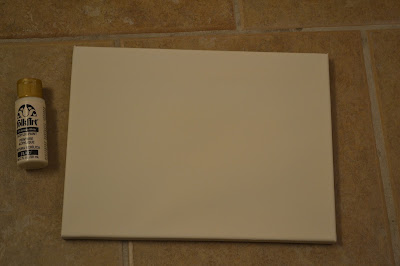
Start with your canvas(mine is 9x12 from Hobby Lobby) and paint it to fit your color scheme, or leave it white if that works for you. I wanted a cream/off-white rather than stark white. I used Vintage White by folk Art and applied with a foam brush.
While your canvas is drying, cut 'our home' on vinyl with your cutting machine. I used this as a reverse stencil (weed out the letters rather than the negative vinyl as you normally would). Since we're using this as a stencil, the color of the vinyl doesn't matter, which is why scrap pieces are perfect for this.
I find that weeding (peeling away) the negative vinyl is a little trickier, so go slowly. If you don't have a cutting machine or scrap pieces of vinyl, you can definitely use a stencil or even scrapbook paper or stickers. I wanted the 'our home' and '3200' to have different dimension and textures. Next, place the vinyl stencil on your canvas and paint the color of your choice. I used Licorice by folk Art.
If you want a somewhat rustic look, paint a little outside the lines like I did. Though, I went a little overboard on the 'e'. If not, use a smaller foam brush or a mini paint brush. While this is drying, cut your numbers and add to the canvas. I used mounting squares for a 3-D affect on my numbers but glue dots would work as well. While at Hobby Lobby buying the canvas for this project, I ran across black & white baker's twine and am happy I decided to pick it up. I really think it adds the perfect finishing touch to "Our Home".
This project is a great addition to our family gallery wall! You should make one for your home too, it's cute, easy and inexpensive. My favorite kind of projects. :)

Friday, February 15, 2013

Accordion Album

I love simple crafts that make a big impact. Like this adorable accordion album inspired by a Hobby Lobby pamphlet. I put this together for my son's nursery and love its addition! Plus I used all materials I had on hand, starting with leftover-moving-box cardboard, so it cost a whopping $0 to make! Even better.
You wanna make one too? Well, head over to Modern Vintage to read the full tutorial. My fabulous sis-in-law and co-owner of Modern Vintage invited me to guest blog on their DIY Friday series today! I'm super excited about it, so clickity click and take a look at this and their many other DIY ideas. Oh, and if you're looking for a wedding planner, Modern Vintage is the place to be!

Tuesday, January 22, 2013

Superhero wreath

So, it's been forever since I've blogged on here. Well, shortly after my last post we had our third child, put our house on the market, sold it, bought a new one, moved out of state and celebrated the holidays. Oh and all the packing and unpacking. Needless to say, I haven't had much time to craft! Until my son's 5th birthday party...superheros. I didn't add any superheros to the wreath, but it went with the color scheme at our party.

I found my inspiration here. A cupcake liner wreath is a really inexpensive option- I bought four packs of red/yellow/blue liners and only used two, plus one pack of mini foil liners and barely made a dent. Here's how I did it:

I bought a wreath from Hobby Lobby and kept the packaging on to prevent a mess. You could also use a foam wreath form. Since I wasn't planning a cowboy or farm party, I covered the wreath with white crepe paper. Attach tape to the back, wrap the paper as tight as you like and add another piece of tape at the end.
Next, I opened the cupcake liners, stuck a pin through the middle and wrapped the liner around the pin (I used sewing pins because I have plenty on hand). Tip: after doing this a few times, I realized the white part of the liner was more prominent on the wreath. So, stick your pin from the outside in, opposite of the picture shown below (forgot to take another pic, sorry). At first you'll think, this can't be right, but once you get them on the wreath and fluff a little, you'll see the colorful side of the liner pops.
 
It will start to look like this:
You can even let your kids help. My little superhero had a lot of fun helping, especially since the wreath was for his birthday party! Leave space to add your ribbon for hanging. 
Here's the finished product. After adding all the blue, red & yellow liners, I filled in gaps with mini foil liners, I really liked this addition, gave it some pop I think. I didn't take pictures when we worked on the 'W' and '5'. Little man helped with these too. I simply drew a W and 5 on pieces of cardboard, cut them out, painted them with acrylic paint and covered with glitter. I had all these supplies on hand. 
This was a fun, inexpensive project and party decor! It's definitely re-usable and is currently hanging on my son's bedroom door...we're in the process of making it a superhero room, so it fits nicely.


Wednesday, August 29, 2012

Cute & Quick!

My MIL bought me a cube storage unit for my birthday and I made a few decorative items to adorn the top. I've decided to share them with you! They're both super quick, easy and in my opinion, cute!

I started with subway art. I wanted a home/family theme and got to work on my computer. You could easily do the same thing with your family names, address and maybe a special time or meaningful place. Just make it specific for your home & family, makes it extra special :)
 Then I painted the $1 frame I purchased from Michael's (or Walmart, can't remember which), grabbed a sheet of paper from my personal stash, cut to size and modge-podged it on! So easy. Cut out the subway art, set in the frame and you're finished! I love the damask design and  anything close to it and I wanted black & white for my decor, but you could use any color combo!
Next, I embellished a simple candle with scrapbook rub-on quotes. This is so easy your head might spin! Buy a candle- I got mine at the dollar store because I only plan to use it for decor, not scenting the house- then buy a sheet of scrapbook rub-on quotes (unless you keep some on hand like me, then just pick a phrase you like). Lastly, cut out the quote, tape it to the candle, rub and done! So simple and super cute! Go make one of your own, or several, you'll love it. :) And they can go anywhere in your house.
Here's what my cube looks like with my new crafts:

Friday, August 17, 2012

Kitchen wall update

I've wanted a vinyl quote on the wall above our kitchen pantry for awhile now. Once my hubby bought Cricut software for my birthday, I was more comfortable pulling this off. Adding vinyl to a jar or door is one thing, but with a space this large I wanted a visual before going forward. Vinyl is not something I want to waste with a mistake. So I set everything up, printed it out, added to my wall and really like the end product. It gives some flair to that wall without being too much.

I wanted the "Glory of God" part of the verse to be special, so I fancied it up a bit. All from the same font cartridge, just print vs. script. My husband and my mom both commented that the eat or drink bunched together throws you off a little, but I didn't want it to just look like a regular 'ol sentence. I wanted certain parts to stand out. Anyway, hope you like it!

Tuesday, August 7, 2012

Tips for using scrapbook rub-ons

Do you like to use rub-ons? I do! They're one of my favorite ways to dress up a scrapbook page in terms of writing/lettering (I don't care for my penmanship). Here's the problem. At least half the time I use them, I manage to rub some other part of a letter onto my page. And I'm very careful, but those little guys still sometimes manage to stick to the page and rub just slightly. This, of course, messes up a letter- or several- that you'll need at some point, plus makes the page look a little messy. Not a fan of this. SO I figured out a better way! Cut, then rub. Maybe you figured this out years ago or maybe you do just fine with the big sheet. But I figured there must be one person out there who could benefit from this information.

I like to use small scissors for this. Carefully
cut out the letters you need
 Place them on your scrapbook page (or where ever
you're using them) and rub. That's it!
Ah, no mess and all the letters are in tact. I also like that this way gives me an opportunity to see the letter placement before applying them. And lastly, I have no idea why the 'y' is ginormous. It's the lowercase y, I checked several times, ha! Hope this little tip helps!

Thursday, July 26, 2012

Front door wreath

For awhile now I've wanted to personalize our front door with a wreath. This, of course, is not a novel idea. Lots of people do this, but I still wanted to dress it up in my own unique way. I've been perusing thrift stores lately and happened to find this diaper wreath:
Baby #3 is a boy, so this would work nicely on the hospital door or nursery door when we bring him home, but a diaper wreath is much more fun for showers. I like the colors and the wreath was already wrapped in blue ribbon (under the diapers)- I knew I could re-use the other ribbons. This cost $6.88. I also wanted to personalize the wreath with our last name initial, so I grabbed a letter from Hobby Lobby:
The letter was $1.99 but I used a HL gift card I received for my birthday (I purchased other items as well) so for me it was technically free! I painted and dressed it up with a little ribbon I have on hand then got to work on the the wreath construction.
First, I removed the diapers from the wreath then took off the ribbons from the diapers and managed to keep both the diapers (can use those for baby!) and the wreath in tact. There were, however, lots of glue marks on the wreath itself, so I flipped it over and used the back side. I knew the ribbon end needed to be covered, so I decided to make flowers out of the ribbon wrapped around the diapers. Each piece was short so I just winged it and started looping the ribbon together. I don't know if people make flowers this way, but I like how it looks and serves my purpose.
I used the same ribbon I wrapped around the B to cover the middle and added a scrapbook embellishment on top of that to finish it off. Again, items I have on hand. I made two of these and three rosettes, then attached everything to the wreath. I think the large ribbon bow gives a nice touch and anchors the wreath. Here's how it looks on my front door:
I definitely could've re-purposed this for a baby decoration, since blue & brown are such good baby boy colors, but I love how this turned out. And the best part: the project cost $8.87!! You can't get much better than that and there's no way I could buy a wreath, four different types of ribbon and diapers to boot for less than $9. I am quickly becoming a fan of thrift stores!! Good luck making your own inexpensive wreath!