Tuesday, April 16, 2013

Our Home Canvas

I mentioned we've moved recently, so I have lots of projects in mind and a clean slate to work with. That's both a good and bad thing-- I have far more ideas or inspiration I've found than time to complete what I want. Typical first world problem, I know.
I'm currently working on a family gallery wall in our upstairs hallway. I had a gallery wall of sorts in our old house, but I'm sprucing it up a little here at the new house. Today I'm sharing a fun project I've completed for the wall. Leading off our home subway art/frame, I made this:

Initially I was going to add only the 3200 (it would've been bigger), but decided it needed a little more than that. Want to make one too? Here's how:

Supplies

Artist canvas

Acrylic paint

Scrapbook paper

Vinyl or stencil

Foam brush

Mounting squares/glue dots

Baker's twine


Tutorial

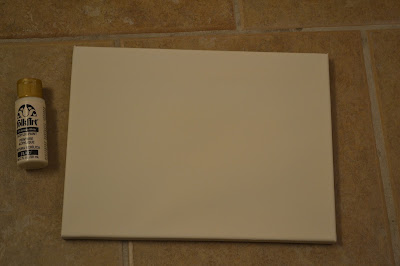
Start with your canvas(mine is 9x12 from Hobby Lobby) and paint it to fit your color scheme, or leave it white if that works for you. I wanted a cream/off-white rather than stark white. I used Vintage White by folk Art and applied with a foam brush.
While your canvas is drying, cut 'our home' on vinyl with your cutting machine. I used this as a reverse stencil (weed out the letters rather than the negative vinyl as you normally would). Since we're using this as a stencil, the color of the vinyl doesn't matter, which is why scrap pieces are perfect for this.
I find that weeding (peeling away) the negative vinyl is a little trickier, so go slowly. If you don't have a cutting machine or scrap pieces of vinyl, you can definitely use a stencil or even scrapbook paper or stickers. I wanted the 'our home' and '3200' to have different dimension and textures. Next, place the vinyl stencil on your canvas and paint the color of your choice. I used Licorice by folk Art.
If you want a somewhat rustic look, paint a little outside the lines like I did. Though, I went a little overboard on the 'e'. If not, use a smaller foam brush or a mini paint brush. While this is drying, cut your numbers and add to the canvas. I used mounting squares for a 3-D affect on my numbers but glue dots would work as well. While at Hobby Lobby buying the canvas for this project, I ran across black & white baker's twine and am happy I decided to pick it up. I really think it adds the perfect finishing touch to "Our Home".
This project is a great addition to our family gallery wall! You should make one for your home too, it's cute, easy and inexpensive. My favorite kind of projects. :)

Friday, February 15, 2013

Accordion Album

I love simple crafts that make a big impact. Like this adorable accordion album inspired by a Hobby Lobby pamphlet. I put this together for my son's nursery and love its addition! Plus I used all materials I had on hand, starting with leftover-moving-box cardboard, so it cost a whopping $0 to make! Even better.
You wanna make one too? Well, head over to Modern Vintage to read the full tutorial. My fabulous sis-in-law and co-owner of Modern Vintage invited me to guest blog on their DIY Friday series today! I'm super excited about it, so clickity click and take a look at this and their many other DIY ideas. Oh, and if you're looking for a wedding planner, Modern Vintage is the place to be!

Tuesday, January 22, 2013

Superhero wreath

So, it's been forever since I've blogged on here. Well, shortly after my last post we had our third child, put our house on the market, sold it, bought a new one, moved out of state and celebrated the holidays. Oh and all the packing and unpacking. Needless to say, I haven't had much time to craft! Until my son's 5th birthday party...superheros. I didn't add any superheros to the wreath, but it went with the color scheme at our party.

I found my inspiration here. A cupcake liner wreath is a really inexpensive option- I bought four packs of red/yellow/blue liners and only used two, plus one pack of mini foil liners and barely made a dent. Here's how I did it:

I bought a wreath from Hobby Lobby and kept the packaging on to prevent a mess. You could also use a foam wreath form. Since I wasn't planning a cowboy or farm party, I covered the wreath with white crepe paper. Attach tape to the back, wrap the paper as tight as you like and add another piece of tape at the end.
Next, I opened the cupcake liners, stuck a pin through the middle and wrapped the liner around the pin (I used sewing pins because I have plenty on hand). Tip: after doing this a few times, I realized the white part of the liner was more prominent on the wreath. So, stick your pin from the outside in, opposite of the picture shown below (forgot to take another pic, sorry). At first you'll think, this can't be right, but once you get them on the wreath and fluff a little, you'll see the colorful side of the liner pops.
 
It will start to look like this:
You can even let your kids help. My little superhero had a lot of fun helping, especially since the wreath was for his birthday party! Leave space to add your ribbon for hanging. 
Here's the finished product. After adding all the blue, red & yellow liners, I filled in gaps with mini foil liners, I really liked this addition, gave it some pop I think. I didn't take pictures when we worked on the 'W' and '5'. Little man helped with these too. I simply drew a W and 5 on pieces of cardboard, cut them out, painted them with acrylic paint and covered with glitter. I had all these supplies on hand. 
This was a fun, inexpensive project and party decor! It's definitely re-usable and is currently hanging on my son's bedroom door...we're in the process of making it a superhero room, so it fits nicely.